Filed under: Uncategorized
Stop motion (also known as stop action or frame-by-frame) is an animation technique to make a physically manipulated object appear to move on its own. The object is moved in small increment and photographed. The photographs are played as a series of frames in a continuous sequence. Think of the concept of a flip book. This moving penny stop motion animation was made with 21 photos.
Here are some more examples:
Monty Python Terry Gilliam Intro
MUTO a wall-painted animation by BLU
Her Morning Elegance / Oren Lavie
We are going to make our own stop motion animations using Adobe Photoshop and Windows Movie Maker. We are eventually going to work on a larger scale, collaborative project, but you will begin with a short stop motion animation to get the idea.
Your assignment:
1. Choose an articulated paper doll from below or find your own. The important part is that all of the limbs are separate. Mix and match if you want.
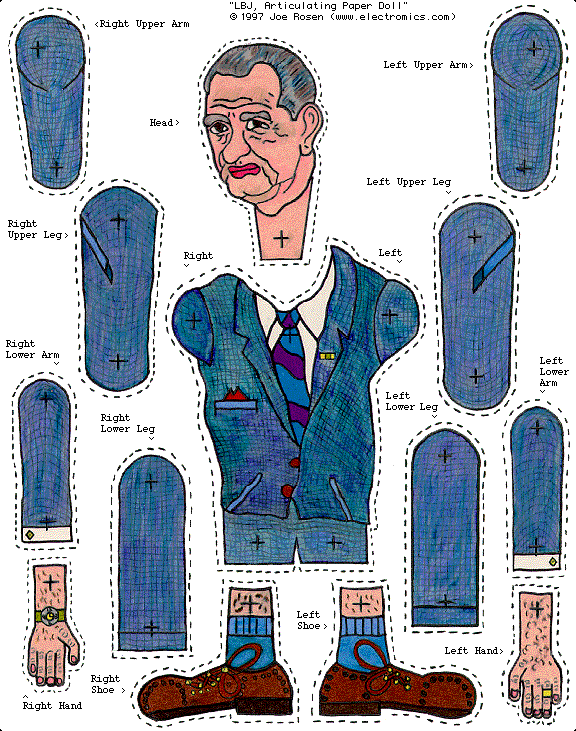
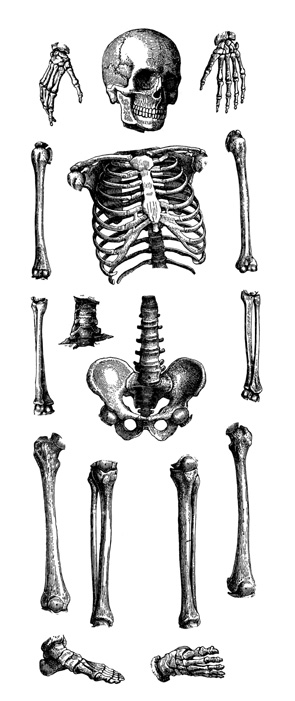
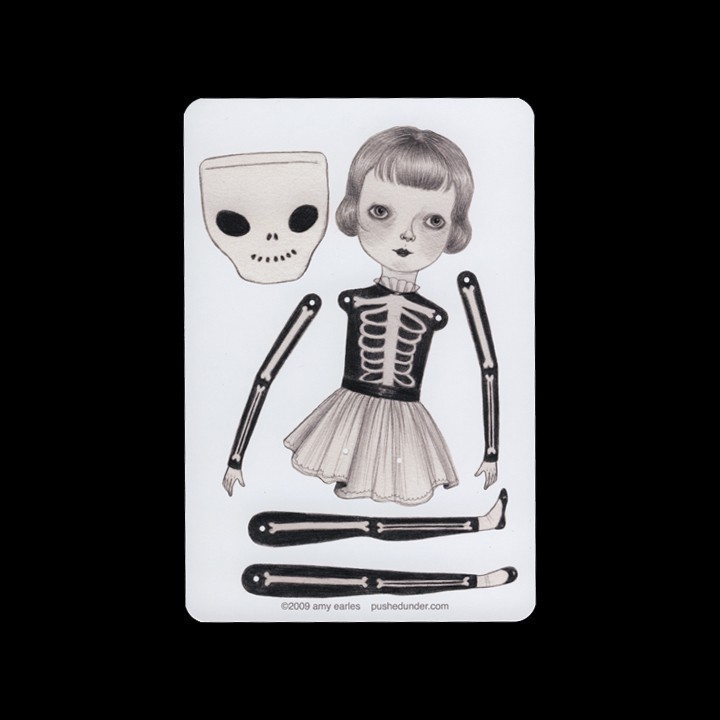
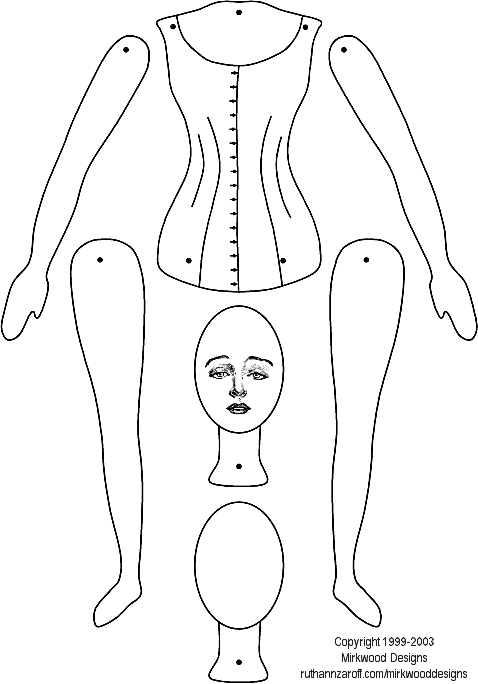
2. Cut out each limb and make it a separate layer. Do this by selecting around a limb with a lasso tool, copying it, deleting it, then pasting it.
3. Once you have the doll put together with each limb in the correct position and in a separate layer, you can begin! Put a background behind it.
4. Your assignment is to make the doll move. First, save the whole file as a photoshop file so you can keep all of the layers. Then, in it’s starting position, save it in a a folder as a jpeg as 1.
5. Move at least two limbs a little bit, then save it as 2.
6. Make things appear to come closer/move away by making them bigger/smaller. Change the background, change the colors. Have fun, make it look cool! I want you to end up with 30 photos, or “frames”.
7. Turn your separate frames into a movie using Windows Movie Maker.
How to Make the Movie!
Now that you have your 30 + images to create your first animation, you need to use Windows Movie Maker to make them into a little movie. Here’s how you do it:
1. Open Windows Movie Maker under programs.
2. Under Capture Video, click Import Pictures and select all of your animation images.
3. Click Tools->Options->Advanced. Change the Picture and Transition duration to about 0.25 seconds.
4. Select all of your pictures from the collections board and drag them down to the storyboard at the bottom.
5. Now you can see how they look as a movie when you click the play button.
6. Go to Edit Movie -> Make titles or Credits. Create a Title Slide with the Title of the animation. Create Credits at the end:
Created by ______________
for Computer Arts
Miss Waggoner
Seward High School
Seward, Alaska
2010
Music: This Song by This Person
8. Add music! Use this website: http://freeplaymusic.com/. This music is not copyrighted and the site is easy to search!
Once you have the audio file in the Collections area, click Show Timeline on the bottom, and then drag that audio file down into your movie. You can now move it to determine when the sound starts, ends, etc.
9. Finish your movie! Once everything is perfect, you need to save your movie as a Windows Media Player file so that anyone can watch it. Under Finish Movie, click Save to my Computer. Choose to save your movie inthe L drive, under your e number. This is because your movie is a big file that takes up a lot of space. Name your movie with the file name, but don’t include any spaces in the title, for example, save it as kittydream, not Kitty Dream. Click Next, and under Movie Setting, Other settings, choose Video for broadband (512 Kbps). Click Next again, now your movie is saving as a WMM file, this should take a minute or so.
10. Post your movie! On your blog, click Plugins ->Embedded Video -> Activate. Then in a new post, click on the little TV symbol. Choose the tab that says upload video. Find your video in the L drive, and upload it. Click the box that says Show video without link. Save your post and preview it to make sure your video plays!
11. Under your movie, write about your experience in making your first animation and Windows Movie Maker. What did you learn? What did you like? What didn’t you like?
No Comments so far
Leave a comment
Leave a comment
Line and paragraph breaks automatic, e-mail address never displayed, HTML allowed:
<a href="" title=""> <abbr title=""> <acronym title=""> <b> <blockquote cite=""> <cite> <code> <del datetime=""> <em> <i> <q cite=""> <s> <strike> <strong>