Reductive Linoleum Print
You guys are doing awesome working on graphic art! I thought for a break from the computer lab we could do a project which combines computer design and making art by hand. We will be making reductive linoleum prints. Here is an example of a reductive print by Lindsey Kromery from last year. How many colors do you see?

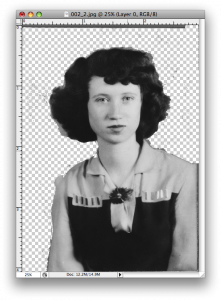
1. Choose a real image of your choice (not a cartoon) and isolate it in Photoshop.

I chose my grandma MAX.

2. Isolate the image and remove the color so its black and white.

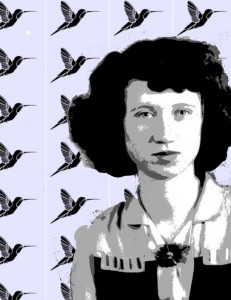
3. Next posterize your image to 3 levels. If it doesn’t look good at first, try adjusting the contrast and then posterizing it.
4. Open a document that is 8.5 x 11 inches. Pick a background to compliment your image! I made my own pattern out of humming birds because my grandma loved them.

You can make your own pattern by selecting an image and clicking Edit–>Define pattern. Then click Layer–>New Fill Layer–>Pattern. However, feel free to pick anything you think would look cool as your background. You guys all have natural design skills, use them to come up with a cool composition. If the background has a lot of colors you should desaturate it and posterize it just like you did with your original image.
5. Save this as a jpeg and print it out to a full page. Now you are ready to start your print!
Rotoball Stop Motion Animation Assignment
Q. What’s a Rotoball?
1. Rotoball is a black ball that transforms into something different for each person who comes into contact with it.
2. Rotoball is a collaborative animation project developed by David Gran for Advanced Video students at Huntington High School in 2005.
You each will make a small movie but together they will make a big movie!
Check out this video from his students to get the idea.
Rules:
The animation must contain:
You catching the ball from the left side of the screen
The ball transforming in some way
You interact with the transformed object
The ball returning to normal
The ball leaving the right hand side of the screen
Each stop motion animation must be made from about 200 frames
1. Develop an idea which follows the above criteria. Type it out and post it to your blog.
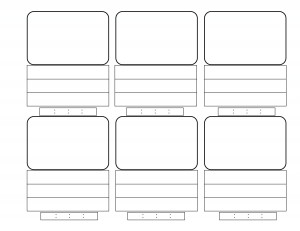
2. Print out this story board and sketch out 6 stages of your story, write what’s happening in each drawing below. Remember, this is going to be a movie, so make some pictures far away to show setting and some close up to show details. Go over with pen so its dark, then scan the storyboard and post it to your blog.

3. Create your main character from a photo. Use the paintbrush tool and paintbucket tool to color over the photo, making it more cartoony, and more importantly, making it yours! I recommend drawing different limbs in different layers so that you can move them separately later (just like the last assignment).
From this:

To this:

4. Make your first background the same way, by painting over a photo. You should have at least 3 different scenes. Make your canvas size 6 inches tall by 8 inches wide.


Wednesday November 02nd 2011, 12:32 pm
Filed under:
Uncategorized


